After six months in our new apartment I can finally say the kitchen is finished done enough to show people! There are still a few more finishing touches, but they are the less noticeable things and may take another six months to get done!
I had some in-process shots of putting the kitchen together but somehow they got lost. :( But at least I have some before pictures!
Before Left Side
Why yes, that is a bare concrete wall. With 12 outlets. Yes, 12.
After!

Before Window Side
AFTER!
Look at that sink! You can't imagine how much trouble that thing was... but SO worth it!
This was the first apartment we have lived in that we had to install our own kitchen. It was a fun and exhausting process! We designed and ordered the kitchen components from Ikea. They delivered, but we (and a BUNCH of our friends) installed it.
First up we had one friend (Tony) who did all the tile work. Isn't it beautiful?!

I wanted those tiny tiles for the whole wall, but that was going to be prohibitively expensive, so another friend (Gudi) suggested doing the mosaic behind the stove and then the strips across the rest of the wall. I LOVE IT!!!
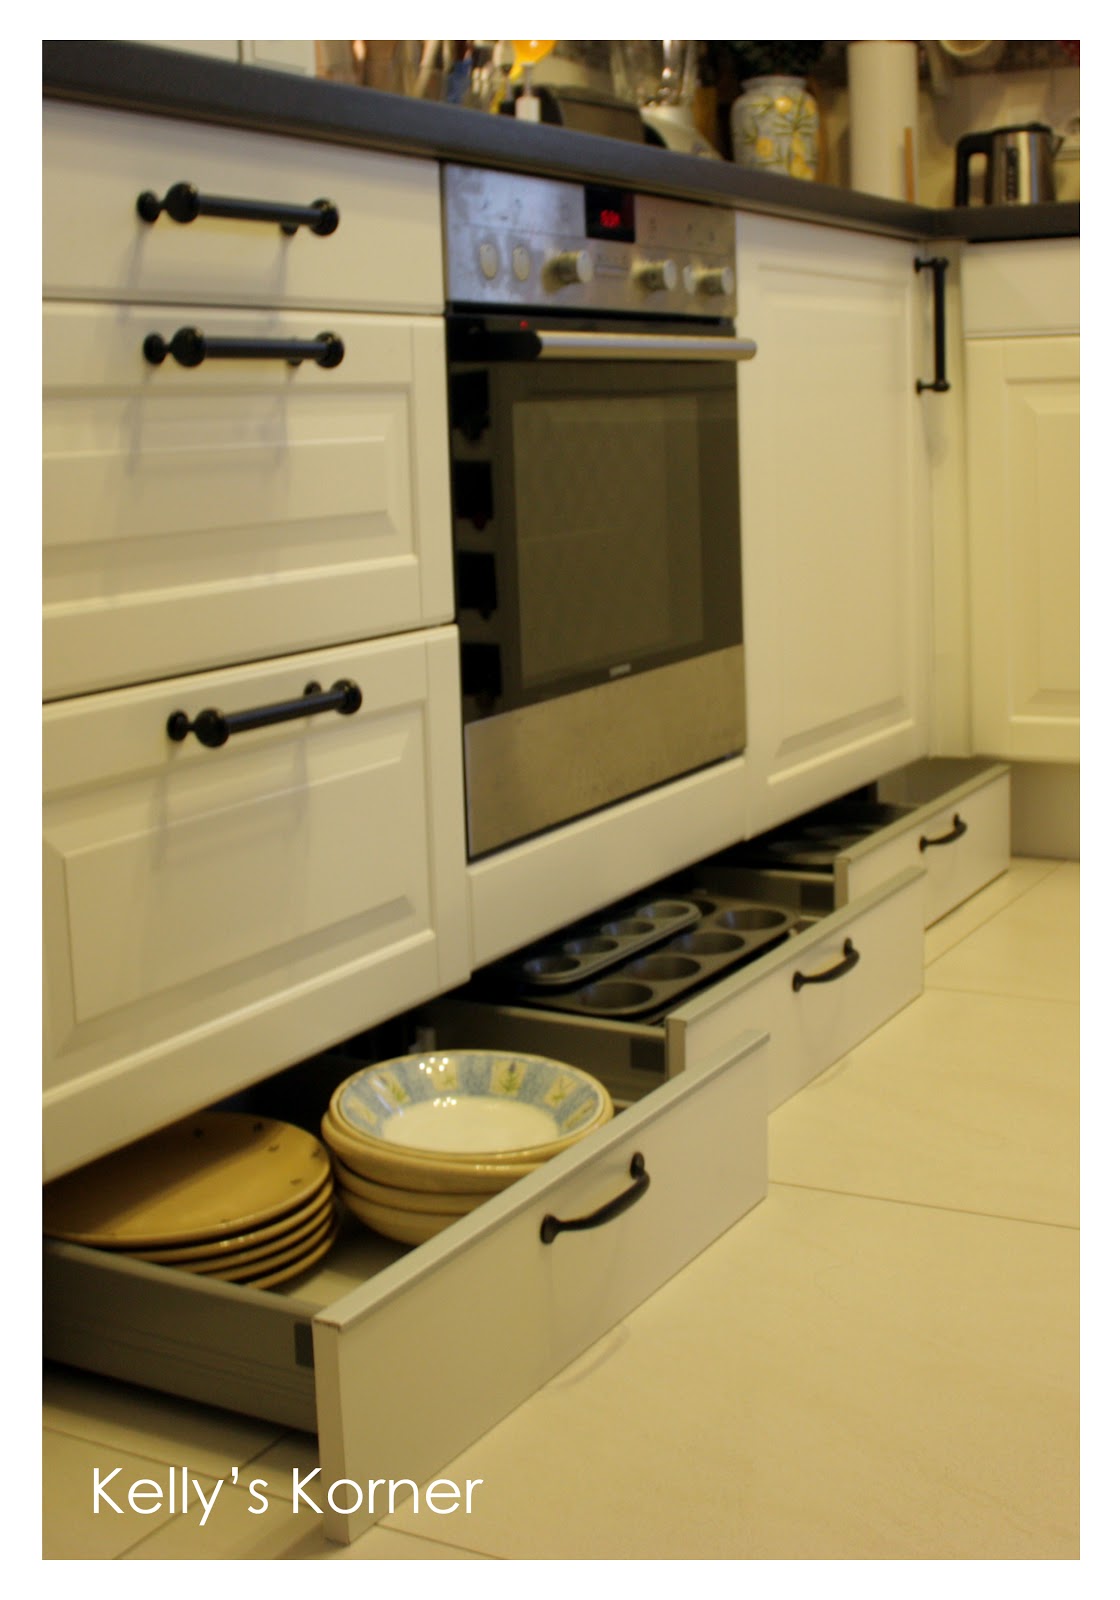
In a kitchen this small every tiny square inch of space is important. That's why I was ECSTATIC when Ikea came out with these toe kick drawers!
They didn't have them six months ago when we installed the kitchen. Our underside had been bare until this week. I installed the drawers and then another friend (Johan, who also did most of the kitchen work) helped with the toe kick piece on the other side of the kitchen. Oh, and I used a table saw for the first time!! I felt very empowered.
One of the crazy things about German kitchens is how TINY their ovens are!! Seriously! I can't believe they cook anything in there! We've been really lucky in our kitchens because our ovens were all on the large side. When we had to buy our own I literally carried my largest cookie sheet to the store to test all the ovens. The store employees may have thought I was crazy. But just LOOK what we found!
The whole oven slides out on a drawer! It is amazing! There are some cons to this type of oven (like the massive heat wave that hits you in the face if you are leaning over the drawer) but overall I'm really happy with it.
This corner is nice. We hung the little shelf this week. It took so long to put up because it required drilling through the tile, which we weren't comfortable with.
We got this kitchen island in the last apartment for extra storage.
It's great for eating, prepping food, homework...
The kitchen is open and looks right into the dining area and living room. Here's a little sneak peak into those rooms from the kitchen point of view.
We just got that lamp hung yesterday!
And the one in the dining room too.
I took off two weeks during the Christmas holiday. The first week was spent getting ready for Christmas and the second week was spent doing these things around the house. It felt great to get things done!
One last project - finally hung my quilt rack. It never made it on the wall in the last apartment, so I'm thrilled to have it up again!
I have a few more projects to blog about including Ethan's room (which is not quite finished) and some crafting projects.
Happy New Year everyone!!